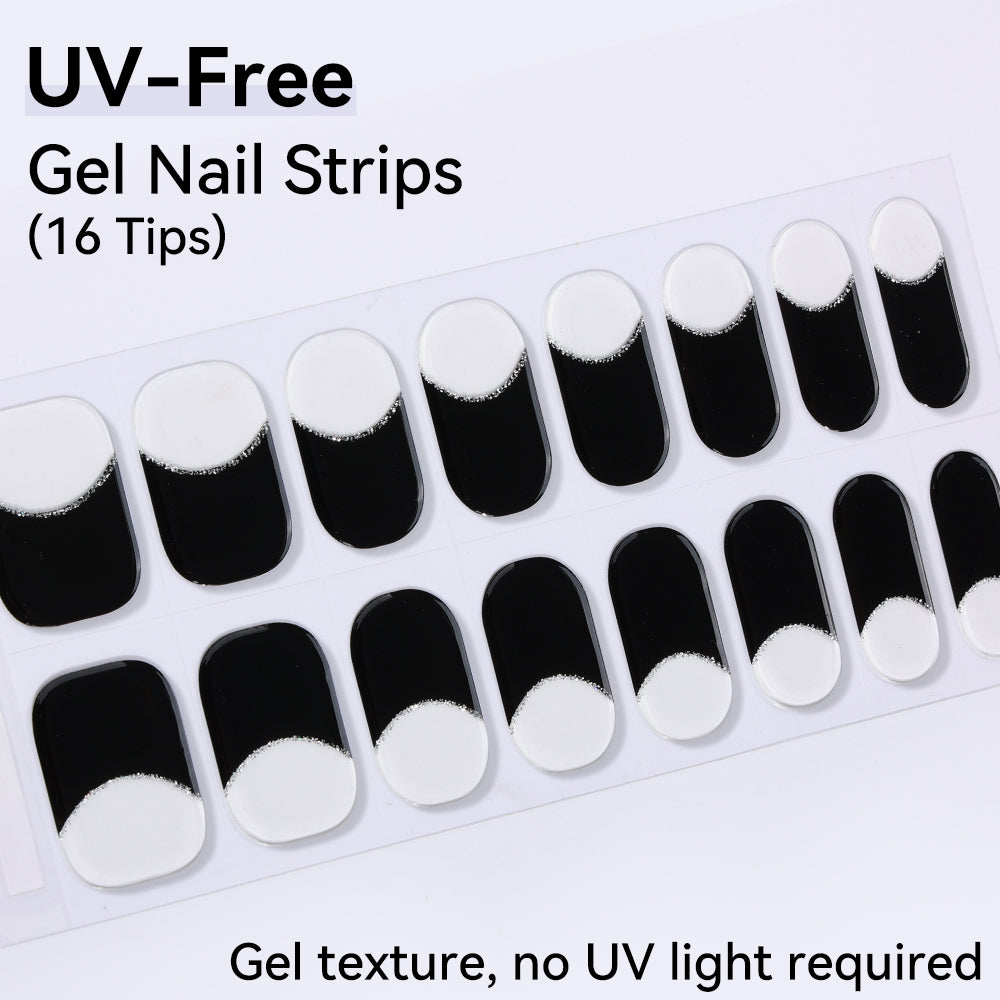
💅 Gel Polish 101: Everything You Need to Know for Flawless, Long-Lasting Nails
📌 What This Guide Actually Covers
✅ What gel polish is and why it's different from what you've been using
✅ The minimum tools you actually need (and the ones you don't)
✅ How to apply it without screwing it up
✅ How to remove it without destroying your nails
✅ The beginner mistakes we all made so you don't have to
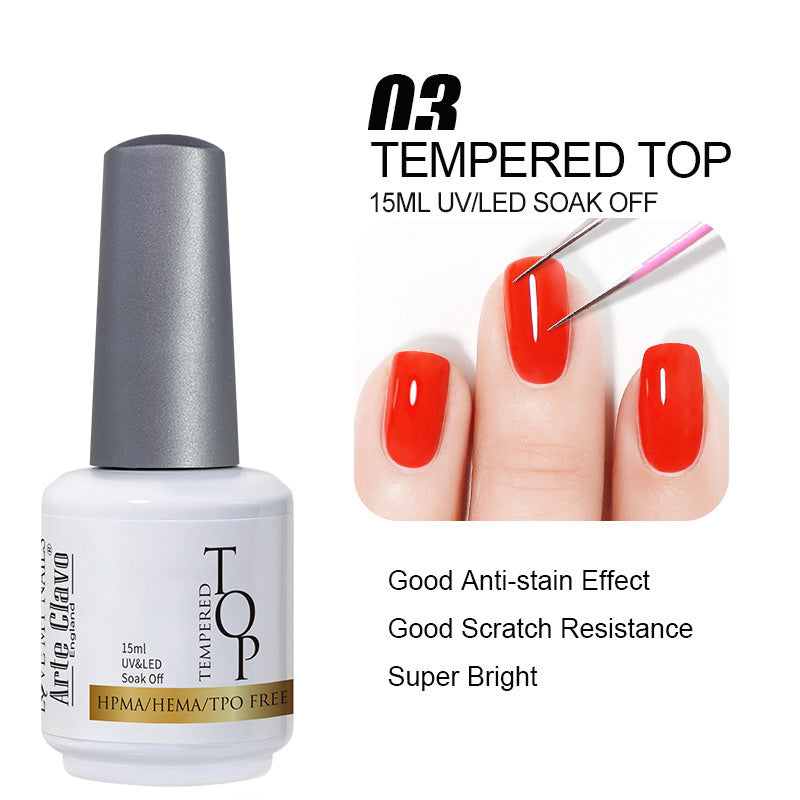
✅ Why HEMA-Free and TPO-Free actually matter for your long-term nail health
💡 Introduction
Let's be honest: traditional nail polish is frustrating.
You spend 30 minutes on a manicure, it looks great for about 48 hours, and then you notice the first chip. And then it gets worse from there. By day four, you're either touching it up constantly or just living with it looking ragged.
Gel polish exists because someone got tired of that. And it's been a legitimate revelation for anyone who's tried it correctly — two to three weeks of perfect color, no chips, no smudges, no anxiety.
But here's what nobody tells you at the beginning: gel polish rewards honesty. The people who have the best experiences with it aren't the ones with the most expensive kits — they're the ones who follow the process correctly, especially the parts that feel like they're slowing you down.
This guide is for you if you're starting from zero. We'll walk through everything, tell you what actually matters, and call out the mistakes that will make you hate gel before you've even given it a fair chance.
Let's get into it.
🧪 What Is Gel Polish, Actually?
Gel polish is a hybrid formula that lives between traditional nail polish and acrylic systems. Here's what makes it different:
The curing process. Gel goes on liquid, but it doesn't dry by evaporation like regular polish. It cures — hardens — when exposed to UV or LED light. That's why it doesn't smudge. That's why it lasts.
The chemistry. The monomers and oligomers in gel form cross-linked polymers when cured. This creates a hard shell that's flexible enough to move with your nail but strong enough to resist chips and scratches.
The wear time. With correct application, gel lasts two to three weeks — sometimes four. Not because the color fades, but because the bond holds.
🆚 Gel vs. Regular Polish: No Contest
| Regular Polish | Gel Polish | |
| Drying Time | 1-2 hours (air dry) | 30-60 seconds (lamp cure) |
| Durability | 2-3 days | 2-3 weeks |
| Shine | Dulls within days | Maintains glass-like gloss |
| Removal | Regular remover | Acetone soak required |
| Upfront cost | Lower | Higher (but cost-per-wear is lower) |
Here's the thing nobody talks about enough: gel costs more upfront, but if you're doing your own nails at home and getting two to three weeks per manicure instead of two to three days, the math changes fast.
✨ Why Gel Polish Actually Wins
1. It lasts.
Not "lasts pretty good." Lasts. Two to three weeks of genuine, chip-free wear. If you're someone who does their own nails, this changes your relationship with manicures entirely.
2. The shine is different.
Regular polish starts dulling the moment it dries. Gel maintains its finish because it's cured, not dried. By week two, your gel manicure still looks freshly done. Your regular polish looks like it came from a different century.
3. It's protective.
Gel adds a structural layer over your natural nail. When applied and removed correctly, it can actually help protect against breakage and splitting. That's not nothing.
4. No smudge anxiety.
Cure under lamp, done. Put on your shirt, touch your hair, sleep — none of it matters. With regular polish, you're hostage to dry time. Gel removes that.
5. It's better for your nails than acrylic.
No, seriously. Acrylic is a powder-liquid system that requires filing the natural nail heavily. Gel bonds to the nail more gently and doesn't require the same level of surface damage for application.
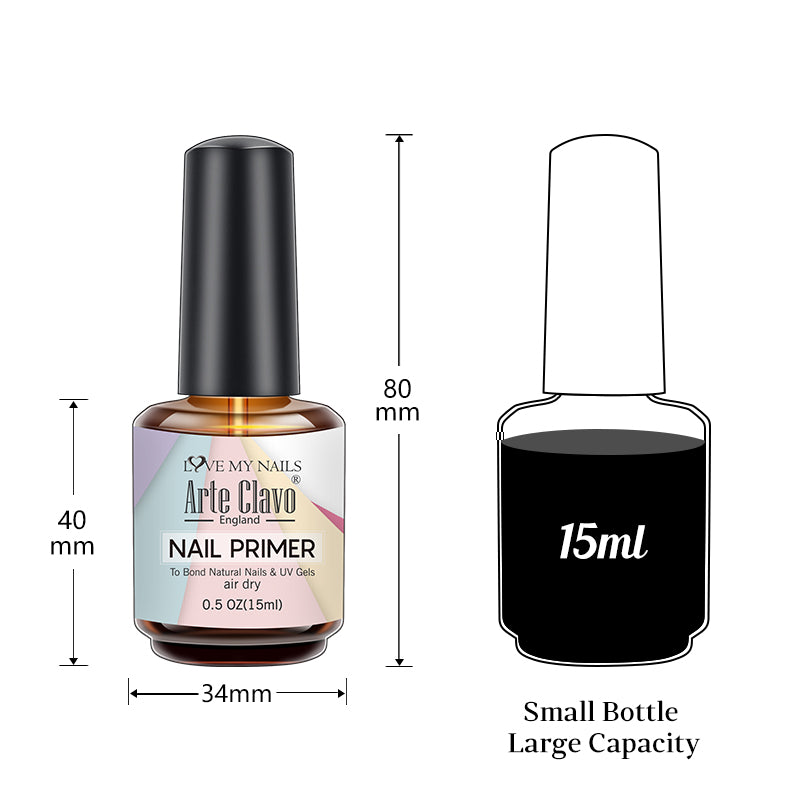
🛠️ The Tools You Actually Need (And The Ones You Don't)
Let's cut through the noise. Here's the honest list:
Prep supplies:
- Nail file and buffer
- Cuticle pusher
- Dehydrator/IPA wipe (not water — water is the enemy here)
- Lint-free wipes
The gel system:
- Base coat
- Color gel (2-3 thin coats)
- Top coat
Curing:
- UV/LED lamp — this is not optional. Gel will not cure without it.
- Minimum 36W, recommended 48W+
- LED cures faster than UV
Removal:
- 100% acetone (not the diluted stuff)
- Cotton pads or balls
- Aluminum foil or remover clips
That's it. You don't need a 50-piece art kit to start. You need the right lamp, the right polish, and patience with the process.
💡 Pro tip on the lamp: Don't cheap out below 36W. Under-powered lamps are the #1 cause of under-curing, which is the #1 cause of allergic reactions to gel. We know it's tempting to buy the $12 lamp on Amazon. Don't.
How to Apply Gel Correctly (The First Time)
Every failed gel manicure starts with skipping something in the prep or application. Don't be that person.
Pre-application checklist:
- ✅ Clean, dry workspace
- ✅ All tools within reach before you start
- ✅ Lamp plugged in and working
- ✅ Nails clean and completely dry
Step 1: The Nail Prep (5-10 minutes — don't skip it)
This is where most people rush. Don't.
- Push cuticles back gently (don't cut them — cutting causes infection risk and permanent damage to the cuticle wall)
- Shape nails with a file
- Buff the surface lightly — you're removing shine, not creating texture
- Clean with dehydrator or IPA. This is not optional. Oil on your nail = lifting. It's just physics.
- Don't touch your nail plate after prep. Your fingers have oil. You cleaned it. Keep it that way.
Step 2: Base Coat (2-3 minutes)
- Apply thin, even layer — this is not the place to be heavy-handed
- Cap the free edge (seal the tip). Every professional does this. It's the easiest way to double your wear time.
- Cure: 30-60 seconds (check your lamp's instructions)
- Don't wipe after curing — there's no inhibition layer on properly cured base
Thick base coat = wrinkling. Just don't.
Step 3: Color (5-8 minutes)
First coat:
- Thin layer
- Cap the free edge
- Avoid skin contact at all costs — this is where allergies come from
- Cure 30-60 seconds
Second coat:
- Thin layer (yes, again)
- Cap the free edge
- Cure 30-60 seconds
- Check opacity — if you can still see your nail through it, do a third coat
⚠️ Warning: Gel on your skin is the main cause of allergic reactions and lifting. If you get it on your skin, wipe it off before curing. Don't let it cure there.
Step 4: Top Coat (2-3 minutes)
- Thin, even layer
- Cap the free edge (this is not optional — it's the single most important thing you can do)
- Cure 60-90 seconds
- Wipe the inhibition layer with alcohol on a lint-free pad
Result: High-gloss, chip-resistant finish that actually lasts.
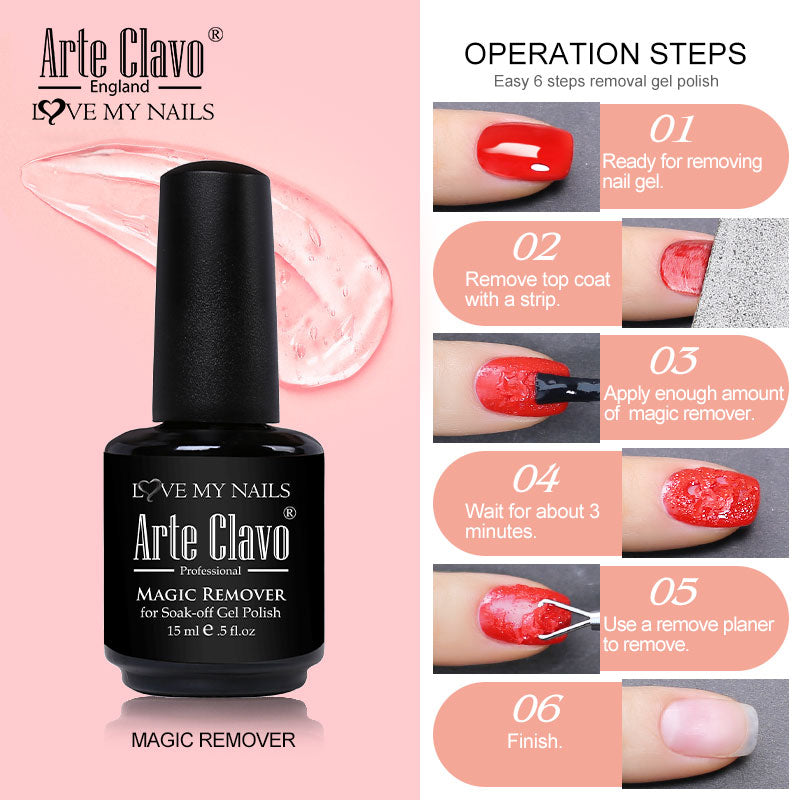
How to Remove Gel Without Ruining Your Nails
⚠️ The number one rule: DON'T pick, peel, or pry it off.
We know it's satisfying. Don't do it.
Picking gel off removes actual layers of your natural nail with it. The damage is real — weakness, thinning, potential infection. If you're picking it off, you're undoing any benefit the gel might have given you.
The safe method (15-20 minutes):
Step 1: Break the seal
- Lightly buff the glossy top coat
- You're removing shine, not your actual nail
- Just enough to let acetone penetrate
Step 2: Acetone soak (10-15 minutes)
- Soak cotton in 100% acetone
- Place on nail, wrap tightly with foil (or use remover clips)
- Wait 10-15 minutes. Don't rush this.
- The gel should look crinkled and lift away when you press gently
Step 3: Remove gently
- Use a cuticle pusher to slide product off
- If it doesn't slide, re-soak. Patience is faster than damage.
- Don't force anything
Step 4: Aftercare
- Wash hands thoroughly
- Apply cuticle oil — your nail plate just lost its protection layer and needs hydration immediately
- Moisturize hands
- Wait 24 hours before applying again. Your nail needs to breathe.
Pro Tips for Beginners (The Ones That Actually Matter)
1. Thin layers. Always.
This is the single most important skill to develop. Thick layers cause wrinkling, uneven cure, and lifting. One thick coat does not equal two thin coats. It just creates problems.
2. Cap the free edge. Every time.
We know we sound like a broken record. That's because it works. Run your brush along the tip of your nail every single time you apply a coat. It's the easiest way to extend your wear by a full week.
3. Give your nails a break.
Don't do gel back-to-back without at least 24 hours in between. Your natural nail needs time to rehydrate and recover. Think of it like a face mask — beneficial, but not something you wear 24/7.
4. Buy a real lamp.
48W minimum. Don't cheap out. Under-powered lamps are the leading cause of under-curing, and under-cured gel is the leading cause of allergic reactions. It's not worth the $20 you save.
5. Quality matters more than quantity.
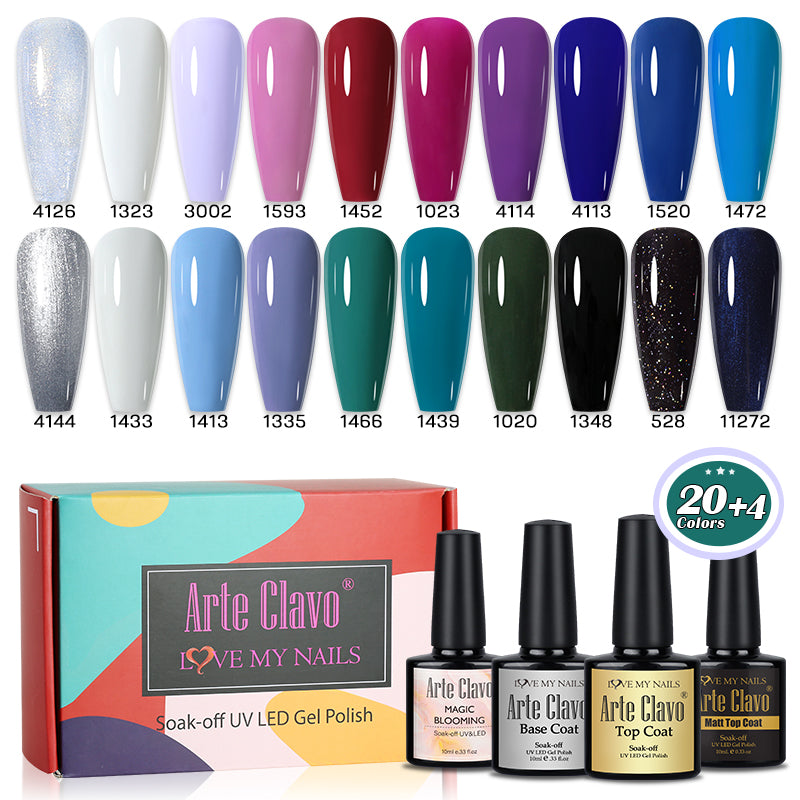
You don't need 15 colors to start. You need 3-4 good ones, a real lamp, and a base/top coat you trust. Arte Clavo's HEMA/TPO-Free system was built for exactly this — simple, clean, professional quality without the allergenic load.
❌ Mistakes That Will Make Gel a Disaster
| Mistake | Consequence | Solution |
| Thick layers | Wrinkling, uncured gel underneath | Apply thin. Two coats, not one thick one. |
| Gel on skin | Lifting, allergic reactions | Wipe it off before curing |
| Under-curing | Soft gel, skin reactions | Use 48W+ lamp, full cure time |
| Skipping prep | Poor adhesion, lifting | Always cleanse and dehydrate |
| Picking/peeling | Removes nail layers, permanent damage | Soak off. Always. |
| Skipping edge cap | Lifting at tip within days | Cap. Every. Coat. |
| Using old/thickened polish | Streaky application, poor cure | If it's thick and gloopy, replace it |
❓ Real FAQ (Answered Honestly)
Q1: How long does gel polish actually last?
A: 2-3 weeks with correct application. Some people get four weeks. If you're getting five days, something in your application is wrong — not the product.
Q2: Can I use regular nail polish over gel?
A: Yes, and it actually works well as a base. Just use a gel top coat over the regular polish to seal it.
Q3: Is gel polish safe?
A: Yes — when applied correctly (no skin contact), removed properly (no peeling), and cured fully (adequate lamp). The safety issues people talk about almost always trace back to one of these three failures, not the product category itself.
Q4: Can I use a UV lamp for LED gel?
A: Usually yes, but LED cures faster. Check your product label. If it's LED-formulated, use an LED lamp for best results.
Q5: How do I choose a gel polish brand?
A: Look for HEMA/TPO-Free formulas, good reviews, and color range that matches what you actually want to wear. Price matters — if it's suspiciously cheap, the formula is probably the reason.
Arte Clavo's HEMA/TPO-Free collection is a good starting point — built for people who want professional results without the allergenic load.
🎁 Starter Kit Recommendations
Budget kit ($50-80):
- LED lamp (36W minimum)
- Base + top coat
- 3-5 colors
- Basic prep tools
- Acetone + foil
Professional kit ($100-150):
- LED lamp (48W+)
- Full prep kit
- Base + top coat
- 10-15 colors
- Removal kit
- Cuticle oil
You don't need the pro kit on day one. Start with the budget kit, learn the process, upgrade as you go.
🚀 Ready to Start? Here's Your First Action Plan
- Get a real lamp (48W+ LED) — non-negotiable
- Start with a small set — base, top, 2-3 colors you actually want to wear
- Follow the prep process — every time, no shortcuts
- Practice thin layers — this is the skill that changes everything
- Remove properly — patience saves your nails
- Give your nails breaks — 24 hours between full sets minimum
💡 Start with Arte Clavo's Beginner-Friendly Kit — everything you need in one place, all HEMA/TPO-Free, nothing you don't need yet.
💬 Questions?
We're here. Real humans, actual help.
📧 Email: cs@arteclavo.com
📱 Instagram: @arteclavo.nails
💬 Live Chat: arteclavo.com